Photoshop Basics
This is a short introduction to Photoshop and how to prepare photographs to be printed or hosted on the web.
Lesson I: Open your Image in Photoshop to be Printed
If you are working with photographs, most of the time you will be editing and saving your image in the jpeg format. This is the preferred format for publishing a photograph on the web or printing a image.
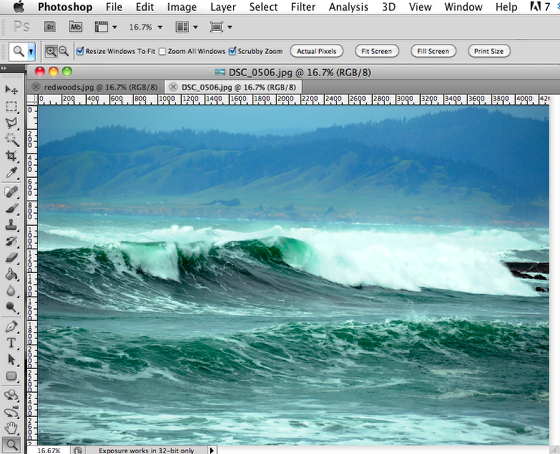
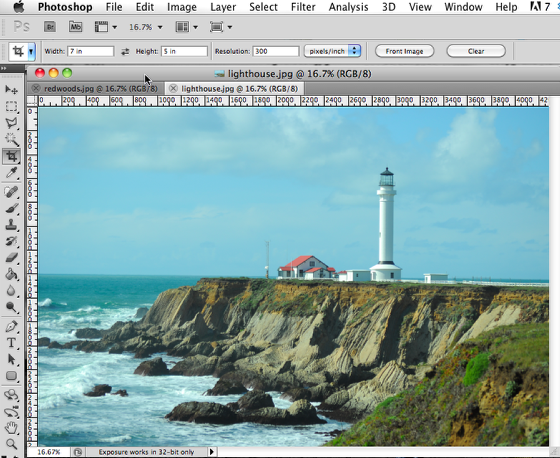
For this tutorial, I am going to work with some high definition images I took on a recent trip
After you open your image in Photoshop, you have to decide what you want to do with the image. You usually either want to print the image or publish the image online. First, I am going to show you how to prepare an image to be printed.
Preparing an Image to be Printed
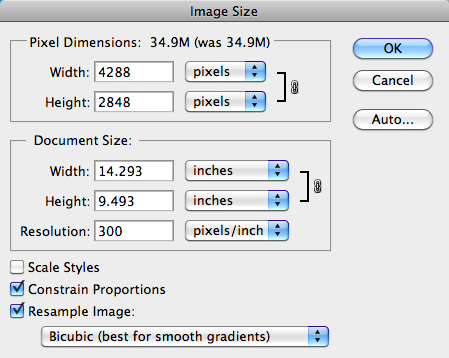
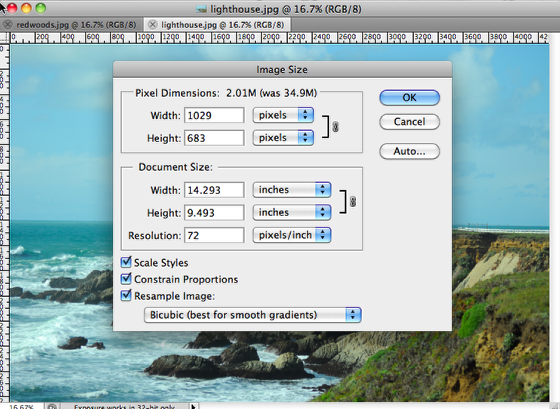
- If you are going to prepare an image to be printed, you need to make sure the image is set to a high resolution. I usually set the resolution somewhere between 200 and 300 pixels per inch.
- In Photoshop, go under the Image menu and select Image Size.
- Under Resolution, I am making sure it is set to 300 pixels per inch.
Resize Your Image
- For this example, I want to create a 5 x 7 print.
- However, as you can see in the screenshot above, if I set the width to 7 inches the height is too small.
- To fix this I am going to have to set the height to 5 inches and crop a little off the width of the image.
Crop the Image
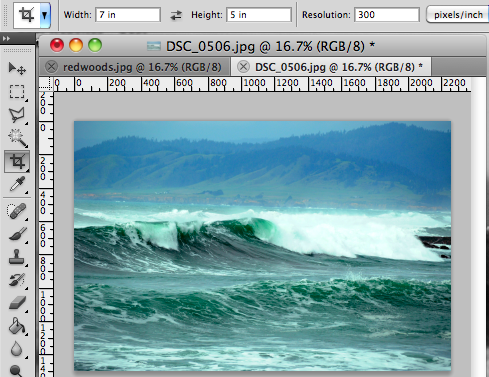
- To crop the image, I am going to click on the Crop Tool in the Tool bar.
- In the options bar at the top of the screen, I am going to set the width to 7in, the height to 5 in and the resolution to 300 (As you can see, you can set the resolution using the crop tool and you don't even have to use the Resize Command in the Image menu).
- Drag your mouse over the image to set the boundaries of the crop.
- Hit enter to accept the crop.
Using the Crop Tool
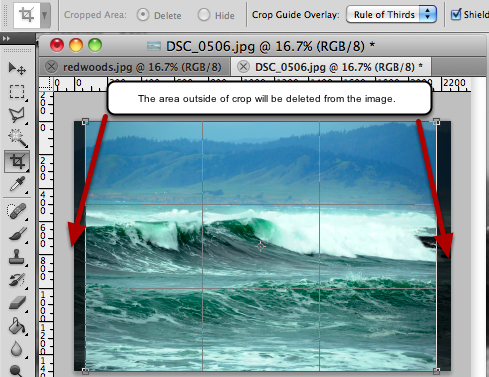
Screenshot of the crop tool, notice the area outside of the crop will be deleted from the image.
Review the size of the Image
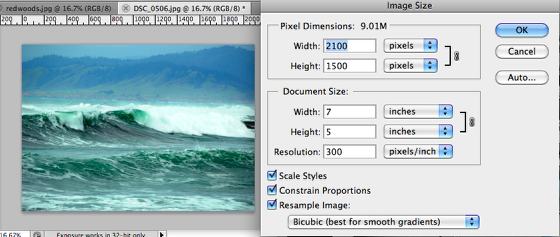
Go back under the Image menu and select, Image Size to review the size and resolution of the 5 x 7 image.
Save the Image as a JPEG
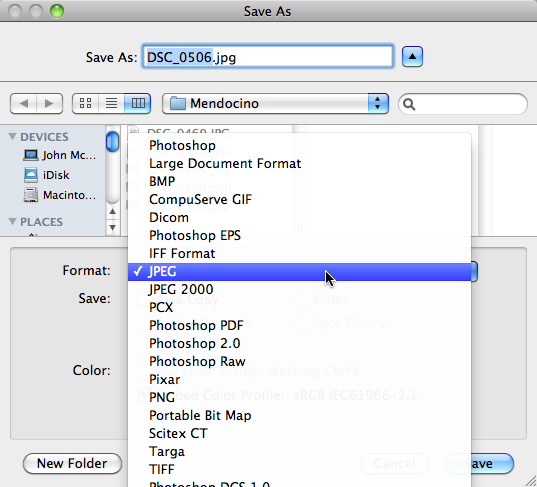
- Go under the File menu and select Save As.
- Give the file a name and select JPEG from the Format drop down menu.
- Click the Save button.
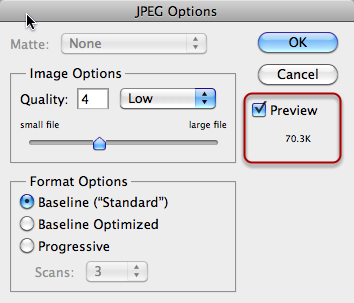
Set the Image Compression in the JPEG Options Menu
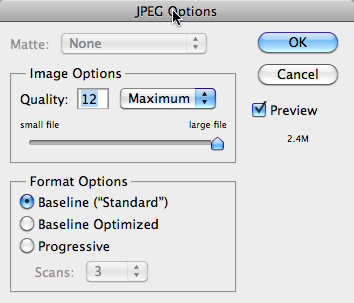
- After you press the Save button, Photoshop opens the JPEG options menu.
- This is where you will set the compression / image quality of your image.
- If you are creating an image to be printed you want to use the highest quality possible, set Quality to 12 and Maximum.
- For Format Options, keep the Baseline.
- Click the OK button to finally save your image.
- Now your image is ready to printed, you can either print it yourself using your home printer with photo paper or upload it to a Photo Center (like WalMart) to be printed.
Lesson 2: Format an Image for the Web
- For this example, we are going to open a high resolution image that we want to compress and prepare to be published online.
- For online images, you want to use lower resolution and compressed images so they will download faster.
- Open the image in Photoshop that you want to publish online.
Prepare the Image
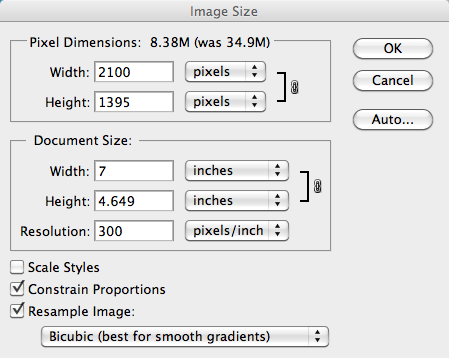
- Go under the image menu and select Resize Image.
- In the Image Size Menu, you want to set the resolution to a lower screen resolution. I usually change it somewhere between 72 and 96 pixels per inch. If your images are going to be viewed on some of the newer "Retina Display" tablets you might want to use a higher resolution.
- Usually when I am resizing an image to be published online, I am more interested in a pixel measurement instead of a measurement in inches. (In this example, every 72 inches is an inch).
Resize the Image
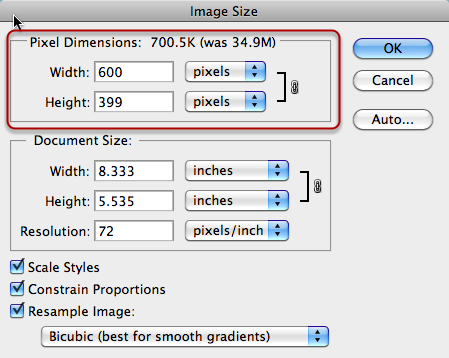
- Your size is only limited by how much area you want the image to take up on the screen.
- For this example, I want the image to be less then 600 pixels, so I am going to change the width to 600.
- You can see by changing the size and resolution of the image, we have lowered the file size from 34.9 megs to 700k.
Save and Compress the Image
- Go under the File menu and select Save As, in the Dialogue Box select JPEG from the drop down menu.
- Using the JPEG Options menu you want to experiment until you get a nice balance of small file size and acceptable quality.
- As you increase the compression, your quality decreases.
Upload the File to Dropbox
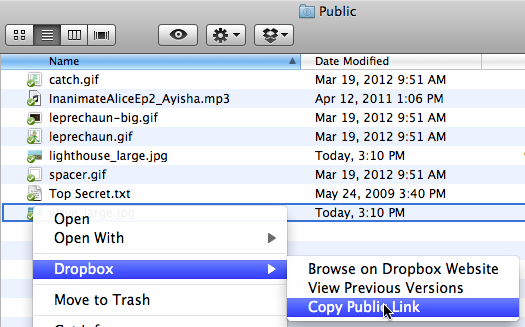
If you want to share this file on the Internet, then you need to upload it to your Public Dropbox folder. Anything saved to this folder is available to anyone on the Internet.
Right click on the image in the Public Folder and Copy the URL to share it.